Twister - en español
What do you need to know to play Twister?
- Hands and Feet (mano, pie)
- Left and right (izquierda, derecha)
- Colors (rojo, azul, amarillo, verde)
Prep: Thanks to my grandmother and her love of garage sales, I acquired several old Twister games. I adapted the accompanied spinner in two ways - on the original spinner, and on the SmartBoard.
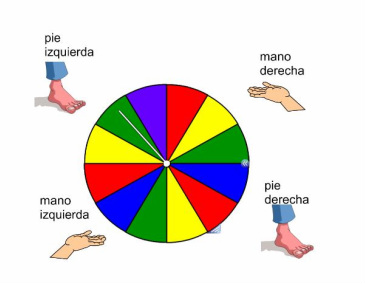
- On the original spinner that comes with the Twister game, cover "Right Foot" with "pie derecha", "Left Hand" with "mano izquierda", and so on. I chose to hand-write the new words on construction paper, laminate it, and glue it to the board. (This smaller board is best for small-group play).
- On the SmartBoard, I selected the spinner from the gallery (interactive media) and adapted its settings so that it had 12 different colors (the real board has 16, but 12 is the max for this media) and alternated the colors - blue, red, yellow, green - around the board. Next, I dragged hand and foot images onto the board and filled in the appropriate Spanish words.
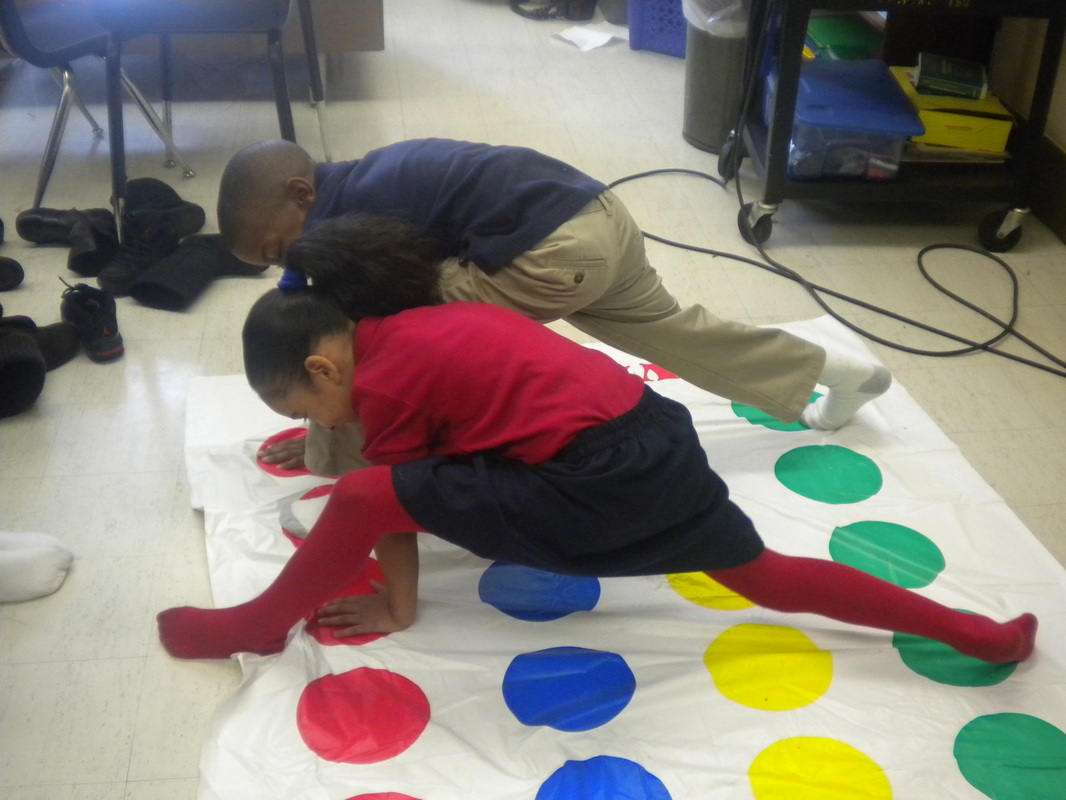
Lesson: This lesson is best done first as a whole-class activity. Once the students understand how to play, the game may be used as a learning station or small-group activity. I've played whole-class in two ways: using one game board and pulling sticks for participants while the rest watch and wait patiently, or (the FUN option) place several boards in a row and invite everyone to find a spot.
1) Make sure your students know how to play Twister - you'd be surprised how many do not! Discuss your preferred rules (Can their bottoms touch the floor? May they share circles? What happens if they make a mistake?
2) Limit the number or players per board, or it'll get crowded (leading to behavior problems). If you have too many students, ask the remaining students to take turns being the "Spinner" - they'll love it.
3) Have a plan for students that are "out" (I ask them to return to their seats to watch and listen so that they'll be ready for the next round).
4) Play the game, have fun with your kids, make it ok to get out (I always say "Oh, I FINALLY got you" or "Susie - I got you this time. I bet I won't next time!"), and know that this will be louder than you wish (but so worth the headache).
- Hands and Feet (mano, pie)
- Left and right (izquierda, derecha)
- Colors (rojo, azul, amarillo, verde)
Prep: Thanks to my grandmother and her love of garage sales, I acquired several old Twister games. I adapted the accompanied spinner in two ways - on the original spinner, and on the SmartBoard.
- On the original spinner that comes with the Twister game, cover "Right Foot" with "pie derecha", "Left Hand" with "mano izquierda", and so on. I chose to hand-write the new words on construction paper, laminate it, and glue it to the board. (This smaller board is best for small-group play).
- On the SmartBoard, I selected the spinner from the gallery (interactive media) and adapted its settings so that it had 12 different colors (the real board has 16, but 12 is the max for this media) and alternated the colors - blue, red, yellow, green - around the board. Next, I dragged hand and foot images onto the board and filled in the appropriate Spanish words.
Lesson: This lesson is best done first as a whole-class activity. Once the students understand how to play, the game may be used as a learning station or small-group activity. I've played whole-class in two ways: using one game board and pulling sticks for participants while the rest watch and wait patiently, or (the FUN option) place several boards in a row and invite everyone to find a spot.
1) Make sure your students know how to play Twister - you'd be surprised how many do not! Discuss your preferred rules (Can their bottoms touch the floor? May they share circles? What happens if they make a mistake?
2) Limit the number or players per board, or it'll get crowded (leading to behavior problems). If you have too many students, ask the remaining students to take turns being the "Spinner" - they'll love it.
3) Have a plan for students that are "out" (I ask them to return to their seats to watch and listen so that they'll be ready for the next round).
4) Play the game, have fun with your kids, make it ok to get out (I always say "Oh, I FINALLY got you" or "Susie - I got you this time. I bet I won't next time!"), and know that this will be louder than you wish (but so worth the headache).
"Heads up, siete up"

Ok, ok... I haven't thought of an awesome name for this activity (I'm open to suggestions!), but this is a great "extra" to have on-hand. "Heads up, siete up" is just like "Heads up, seven up" except that our leaders where lanyards and students have to name the spanish number/word/object worn by the leader. I borrowed this idea from my middle school colleague, M. Caputo, in the spring. My favorite part about this game is that the room will be completely silent, yet my students LOVE it! The following example is for identifying numbers in Kindergarten; however, it can be adapted for many lessons and levels (right we're using this game to identify classroom objects in third grade).
"Heads up, cuatro up" - "Números"
Prep: Gather a group of lanyards. I bought a 50-pack at Office Max, but you could probably gather them from conferences, etc. Last year I tried to make my own using yarn and laminated paper, but they tore too easily. Ok, once you have your lanyards you fill them with pictures, numbers, sight words - whatever. This time, we're using numbers. You can write the numeral, or dots. That's it. You're ready.
Lesson: Call up the appropriate number of students. In this case, we're practicing 1-4, so we need four students. Give each student a lanyard with a number on it. Ask students to help as you review how to play "Heads up, seven up." I always like to give the reminder that if you are peeking, your classmate will not want to pick you. Give the "heads down, thumbs up" direction and allow the four leaders to each gently press down the thumb of a classmate. Now, you can give the direct "heads up, cuatro up." When the students stand up, they need to guess the Spanish number worn by the person who they think pressed for the thumb. For example, if I think that Lisa pressed my thumb, I need to look at her lanyard. Her lanyard has four dots on it, so I need to guess "cuatro." This is also a great wrap up activity to use when you finish early.
"El bolso de misterio"
The "Mystery Bag" game is a staple activity in my kindergarten and first grade Spanish classes. While the following lesson plan is for animal lesson, this activity can be adapted to almost anything: numbers, letters, colors, shapes, transportation, classroom objects, etc. The one my students loves most is "El bolso de misterio" with body parts. I bought some body parts from Oriental Trading during Halloween season and my grandma found some doll parts and garage sales - the kids go crazy for that one! I am so thankful for my former colleague and mentor, C. Threw, for introducing me to "el bolso de misterio."
"El bolso de misterio" - "Animales"
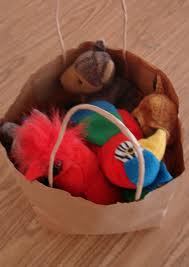
Prep: Fill a bag (reusable shopping bags are perfect) with enough animals for each student to choose one from the bag - beanie babies and other small toys are great. The animal names should be fairly familiar to the students before doing this activity, perhaps with one new word. [Example: we previously learned gato y perro. Today we'll learn pez. For a class of 25, I'd have 10 cats, 10 dogs, and 5 fish.]
Lesson: Review the previously-learned animal names and introduce your new animal. Choose animals from the bag to "quiz" the class as a whole. When they start to feel confident, you're ready to start your game! Call one student at a time (I like to pull sticks) to come up and reach into the bag. They are not to look in the bag (no peeking!) but rather choose one quickly. While the student comes up and reaches you say "El bolso de misterio" in your best mystery voice - invite the students to say it as well if you'd like. The student's job is to name the animal, in Spanish. I usually ask "What is it?" or "Which animal is it?" (in Spanish of course). If the student does not know, I allow them to "phone a friend" but I always try to come back to that student later. Finally, you set the animal to the side and invite another student up to reach into the bag. When every student has had a chance to play, we do some sort of review - I either have the class name the animals as I toss them back in the bag, or have them count (in Spanish) how many of each animal we named as I put them back in the bag.
"El bolso de misterio" - "Animales"
Prep: Fill a bag (reusable shopping bags are perfect) with enough animals for each student to choose one from the bag - beanie babies and other small toys are great. The animal names should be fairly familiar to the students before doing this activity, perhaps with one new word. [Example: we previously learned gato y perro. Today we'll learn pez. For a class of 25, I'd have 10 cats, 10 dogs, and 5 fish.]
Lesson: Review the previously-learned animal names and introduce your new animal. Choose animals from the bag to "quiz" the class as a whole. When they start to feel confident, you're ready to start your game! Call one student at a time (I like to pull sticks) to come up and reach into the bag. They are not to look in the bag (no peeking!) but rather choose one quickly. While the student comes up and reaches you say "El bolso de misterio" in your best mystery voice - invite the students to say it as well if you'd like. The student's job is to name the animal, in Spanish. I usually ask "What is it?" or "Which animal is it?" (in Spanish of course). If the student does not know, I allow them to "phone a friend" but I always try to come back to that student later. Finally, you set the animal to the side and invite another student up to reach into the bag. When every student has had a chance to play, we do some sort of review - I either have the class name the animals as I toss them back in the bag, or have them count (in Spanish) how many of each animal we named as I put them back in the bag.
"Vamos a pescar."

When I saw this magnetic number fishing game on pinterest (via makedoandfriend.blogspot.com) I knew it was going to be a hit! We mixed it up in class by playing "vamos a pescar" instead of "el bolso de misterio."
Prep: Find a bin, tub, or other container to be your "lago." Gather magnetic numbers. Create a fishing pole with a strong magnet (I can't stress this enough as on the first day I used a regular magnet and they fish did not want to "bite" so it was a long day of fishing ;) I rolled up some construction paper, taped on a string, and tied on a strong magnet that I got from our science teacher. Now that I know how much the students enjoy this activity, I'm on the look-out for a kids' fishing pole to use.
Lesson: Just as with "El bolso de misterio," pull sticks and invite the kiddos up one at a time. For this game I said "Vamos a pescar con...." and said the students name. They were listening and smiling with delight. Hand over the fishing pole and let the student going fishing. Then, pull the number off of the line and ask "¿Qué número?" Have the students repeat, then move on to the next student!
